

The garden path is an essential element in any garden design. It can serve multiple functions. We primarily think of them for the strictly utilitarian use of keeping our feet clean and dry for moving from point A to point B. However, the garden path can also cause us to slow down, appreciate the beauty and wonder of nature and slowly reveal the enchantment of a garden.
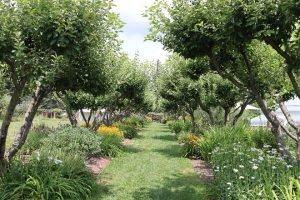 From a utilitarian perspective a garden path can direct us to entries and exits giving us a clean smooth direct route to the house and around the garden. Here the primary concerns are the cost, path surface materials and path width. Often concrete is used for its durability, low maintenance and its flexibility to take on any shape we desire. Once installed it typically remains for a lifetime. If there was a concrete path at your home when you moved into your home, it is most likely unchanged today.
If you want to install a new garden path, there are many things to consider. The material you use should match the style of garden you envision. A contemporary or formal garden are most frequently expressed with straight lines and hard surfaces such as concrete. If using pavers, they should have flat surfaces and square corners such as bluestone or large concrete slabs. The paths have defined edges and plantings can be separated by a low hedge, strip of lawn or maintained in a raised bed.
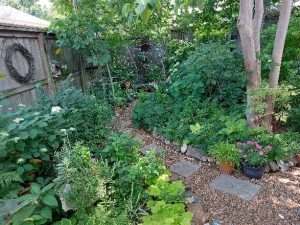 In the more relaxed cottage garden, curved pathways reflect the looser feeling of the garden. Concrete and pavers are usually replaced by brick or natural stones as the pathway material. Plantings are permitted to spill into the path.
For the native garden and wildlife garden styles gravel, mulch or grass are the primary choices for path materials. Paths may be narrow and twisting with plants nearly unrestrained.
| Material | Pro | Con |
| Mulch | Easy to work with because it is lightweight
Relatively inexpensive, so you will save money Permeable and typically locally sourced |
Needs to be replenished as it breaks down
Easily displaced by wind, water, and foot traffic Not conducive to walking barefoot |
| Gravel | Material available in bulk, Simple to maintain.
Permeable surface Available in many different types, sizes, and colors |
Hard on the feet and knees
Gravel that migrates to the grass can be a safety hazard when mowing |
| Pavers | Flat, even surface
Extensive design choices, Long-lasting |
installation is expensive and labor-intensive
Weeds can grow through cracks |
| Concrete | Holds up well in hot climates
Easy to maintain Can be stained or stamped for a custom look |
Cracks with frequent freeze/thaw cycles
Repairs are easily visible |
| Natural Stone | Semi-permanent solution Blends in beautifully with outdoor space
Easy DIY option |
More expensive than pavers
Uneven surface can be a tripping hazard and is not conducive to wheelbarrows or wheelchairs |
| Asphalt | Holds up well in cold climates
Easy to patch holes, Budget-friendly |
Gets sticky or tacky in high temperatures
Not environmentally friendly |
| Wood Planks | Can use recycled materials
Great for sloped sites |
The boards will need to be replaced over time
May splinter |
| Grass (Sunny)
Moss (Shady) |
Lovely to walk barefoot
DIY friendly Water permeable |
Needs constant maintenance
May not feel like a formal path |
The width of the path is determined by how you want people to move through the garden. A width of four feet is enough to allow people to move side by side. Primary paths are those with the highest traffic such as from the driveway and sidewalk to the house. These paths should be at least four feet wide and should be constructed with a hard smooth easily maintained surface to allow visitors with mobility issues easy access. Secondary paths that extend further into the landscape can be narrowed to 30-36” which is wide enough for a person and a wheelbarrow, lawn mower or wheelchair. A lawn tractor, however, would require a wider path. In some designs, a path of just 24” is used to bring the garden visitor into more intimate areas and closer to plants and garden features. The narrow single file path also tends to slow down the pace of the visitor.
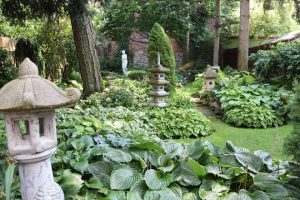 A narrow path also allows you to plant scented plants close by so that a visitor can brush against them releasing their scent and enhancing their experience. On a garden tour last year, I visited a garden with an open lawn area in full sun that was used for parties and to play games like croquet. Surrounding the lawn was a wide planting bed that had a narrow pathway through its center. This area provided a shaded respite from the sun that allowed them to grow shade plants. They had carved out sitting spots with views out to the lawn. In this intimate area you feel closer to nature, able to observe plants closely, as well as birds, squirrels, bugs, and skinks that made their home in this little recreation of the forest edge.
January in Memphis, TN is an ideal time to make a garden path. There are many mild sunny days for you to do this more demanding work without ever breaking a sweat. Perhaps the most essential element and one that is often overlooked by the DIY garden developer is the base for your path. If done correctly your path will outlive you.
First make sure that your path location will not impede the natural drainage pattern of your garden. After marking the path excavate the area to a depth of 4-6 inches make the floor as flat and even a possible and the sides straight. You will next want to put in edging to help hold the pathway in place so that the edges will not slump and slowly ooze out into the garden beds. My preference is for steel edging for its stiffness, durability, and ease of use.
 After excavation and edging the path, the outline base layer is laid down. Path materials can usually be purchased in bulk from a stone yard or mulch yard. Put down a 2–3-inch layer of CR610 limestone, a blend of sizes from a powder up to 2 inches, which lock together to make a solid base. This needs to be compacted either with a 6- or 8-inch-square hand tamper or if you are covering a large area are you can rent a motorized vibratory plate compactor. Dampening the crushed stone first keeps down dust and helps with compaction. Once this is completed, you can consider a layer of landscape fabric over the top, but it is not mandatory. Now to finish it off I like to use another 2-3 inches of #10 Limestone (¼ inch down to powder) which is then compacted. This is all you need for your gravel path. If you want to use a courser gravel like pea gravel or a larger size of limestone you can do so but know that pea gravel does not lock together and makes it difficult for wheels to travel along the pathway.
You will use the same base and edging for other materials like brick or pavers. For these alternates I still like to use the 2-3 inches of #10 Limestone which has been compacted before placing the top layer of pavers, stone, or brick. For natural stone with its irregular face, I like to put down an inch of compacted #10 and then an inch – inch and a half of loose #10. I can then place my natural stones and wiggle them down into the gravel to get a level surface. I then fill in all the joints between the stone and a layer over the top of the stone before watering in this layer with a hose to wash off the top of the stone and fill the voids left under the stones. Repeat this step if necessary.
A grass path can be maintained by simply mowing, however using some barrier between your beds and the path will help to control the movement of grass or weeds into the beds. Metal, plastic, concrete, brick, or stone edging buried 2” below the surface will block most underground movement of grass into the beds from the grass path. The edging will also give you something to trim against with your string trimmer to keep grass from climbing over the edging into the beds.
A mulch path can be as simple as laying the mulch material down on the ground. Do not use landscape fabric under the mulch. If you first want to kill the grass, you can use an herbicide according to label directions or a layer of cardboard or four plies of newspaper to smother the grass. The same edging used on a grass path will help contain the mulch on the path and help to prevent your garden bed plants from growing into the path.
Last fall I eliminated the last bit of grass in my garden by converting it into a larger bed for perennials. As it was a wide bed, I added a path that really goes nowhere and just loops around to access the front porch. I think it looks nice and gives me access to tend to my plants. It divides the bed which also opened up more design planting possibilities. I am planting small and mid-size perennials along both sides of the path. If I did not have the path, I would have had a few small plants on the street side of the bed and shrubs in the back which would have been far less interesting to me. Like my little path to nowhere a garden path can simply take you to a closer connection to your garden and the wonder of nature.
